
How to Wear and Adjust Your St. Michael Magnetic Copper BraceletUpdated 4 hours ago
This guide covers everything you need to know about your St. Michael Magnetic Copper Bracelet: how the clasp works, how to put it on and take it off, how to adjust the fit by removing links, and how to care for your bracelet so it lasts.
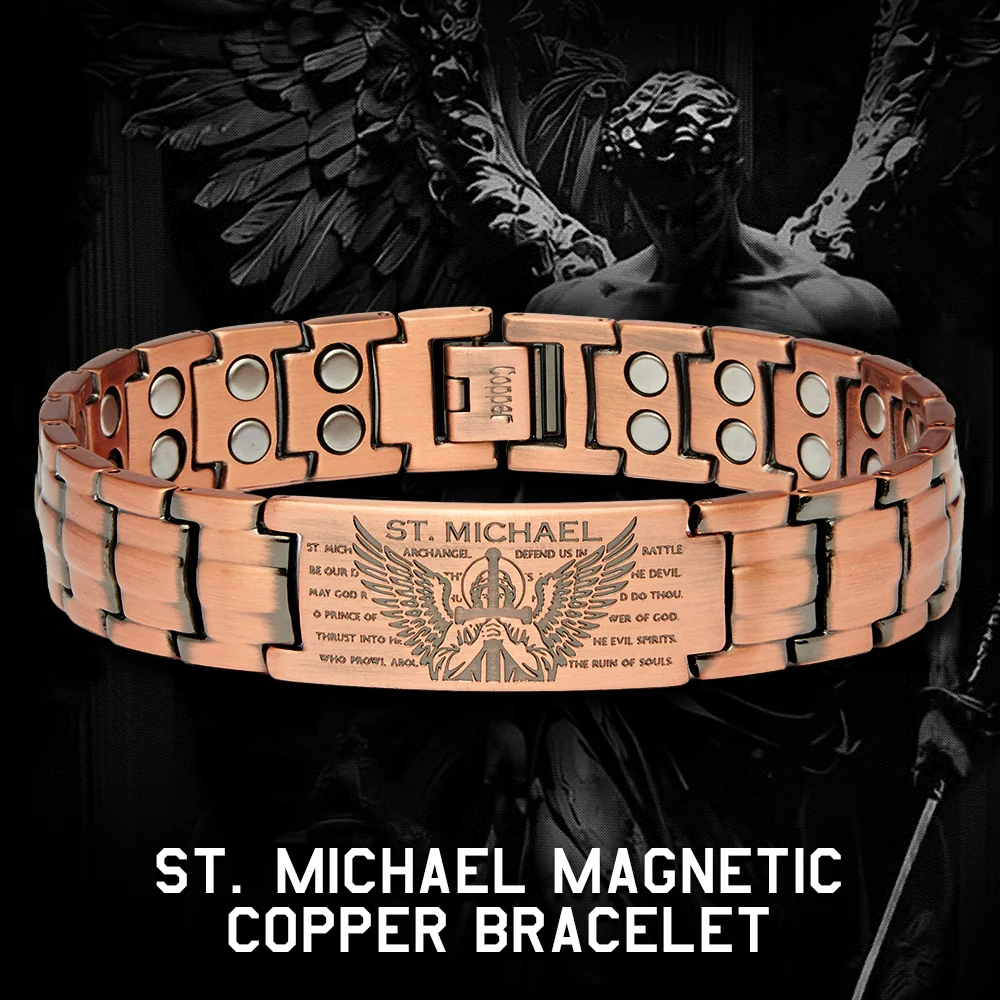
How the clasp works
Your bracelet has a decorative St. Michael plate on the front and a fold-over clasp on the back. The clasp, stamped "COPPER" on the inside, is attached to one end of the band, and the other end has a bar that the clasp hooks onto. The clasp has two edges: a hinged edge and an edge with a small lip. You open it from the lip.
Putting it on
- Open the clasp. Place your thumb under the lip and push up until the clasp pops open.
- Wrap it around your wrist with the St. Michael plate facing out.
- Hook and close. Hook the open clasp over the bar on the other end. Fold it flat and press down until it clicks.
Taking it off
Turn your wrist over, place your thumb under the lip, and push up until the clasp pops open. Unhook it from the bar and slide the bracelet off.
Making it smaller (removing links)
Each link is held together by a small pin at each end. Your bracelet comes with a link removal tool for pushing the pins out.
Before you start: Lay the bracelet on a soft cloth or towel to prevent scratches. Keep every pin you remove. You'll need them to reconnect the band, and we don't sell replacements.
- Position the bracelet. Open the clasp from the lip and lay the bracelet face up in the tool, with the clasp on the right.
- Check that you're on the correct side. Look at the pinhole lined up with the tool's push pin. The pin should sit slightly recessed, with a small gap inside the hole. If the pin sits flush with the surface, you're on the wrong side. Don't push from that side, because it can damage the bracelet and the tool.
- Push out the first pin. Turn the knob clockwise. If the pin doesn't move, loosen and tighten the knob a few times to work it free. Don't force it.
- Pull the pin free. Once it's sticking out, pull it the rest of the way with your fingers or pliers.
- Repeat on the other end of the link. Move to the pin on the other side of the same link, check that you're on the recessed side, and push it out the same way. The link will come free.
- Reconnect the band. Line up the open ends. Insert one of the pins from the flush side, the side it came out of, and press it in until it sits flush again. Give the band a gentle tug to make sure it's secure.
Tip: To remove more than one link, take them out one at a time and check the fit after each. If you already know how many you need to remove, you can push out the pins at each end of a group of links and take them out together.
Note: With all links in place, the bracelet is at its longest. Keep any removed links and the extra pin. We don't sell replacements, so you'll need them to make it longer again.
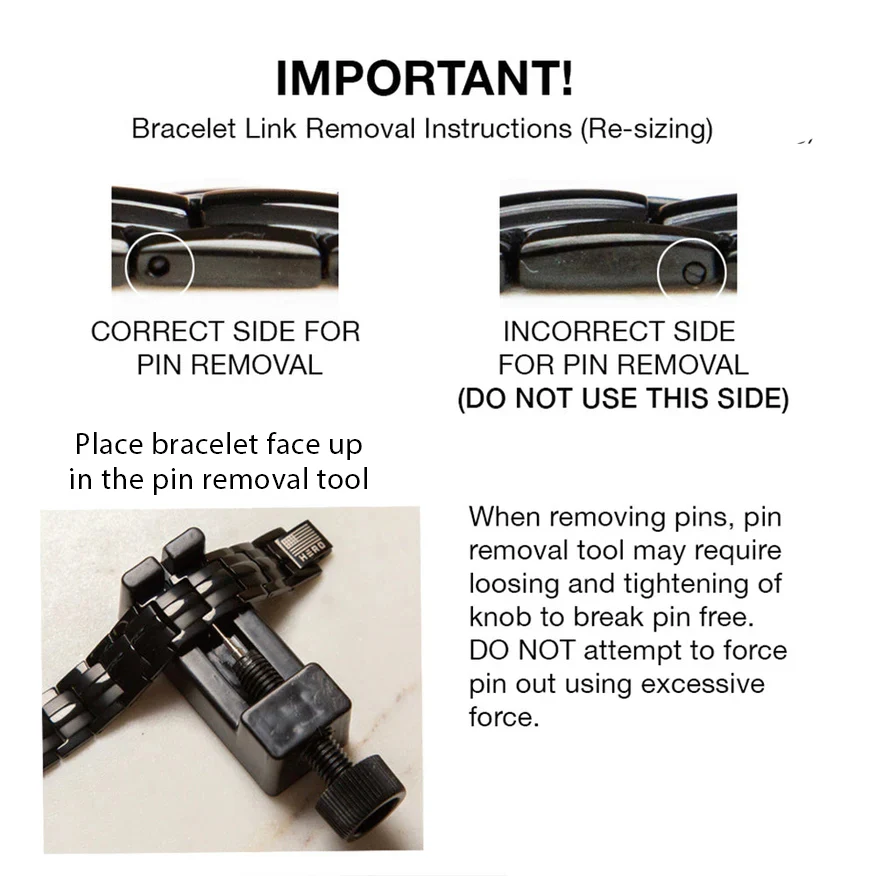
Shown on a similar Hero Co bracelet. The steps are the same.
Care tips
- Cleaning: Wipe your bracelet with a soft cloth and mild soap if needed. Let it air dry completely before wearing it again.
- Water: Take your bracelet off before swimming or showering. Long exposure to water can weaken it over time. If it gets wet, pat it dry with a soft cloth.
- Copper finish: Genuine copper naturally darkens or develops a patina over time, and each piece ages a little differently. This is normal and isn't a defect. Copper can also leave a temporary green or dark tint on some skin types, caused by sweat, natural oils, or skincare products. It's harmless and washes off with soap and water.
- Lotions and chemicals: Put on lotions, perfume, and other skincare before your bracelet, and let them dry first. They can speed up discoloration on the copper.
- Storage: When you're not wearing it, keep your bracelet in a cool, dry place.
If you have any questions or need help, please contact our customer service team.
Thank you for your support. Wear it with pride!